BLOGGER TEMPLATES AND TWITTER BACKGROUNDS

Pages

Saturday, 31 December 2011

First Sneak Peak Strawberry Kisses

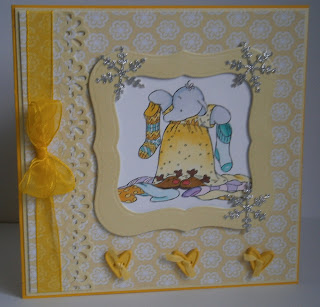
Oh I am soooo excited today I have been told that I can share with you a card from the new range from Crafters Companion Strawberry Kisses. I am not going to give too much away today but pop back onto my blog tomorrow for some fantastic news about this range and a chance to win ..........., well pop back tomorrow for more info :). But today I am going to share with you my first sneak peak, I just so loved working with this.


I used the amazing Spectrum Noirs to colour the image,and the Pastels Centura pearl card.The colours I used are :
CT1
CT3
FS6
TN2
TB1
TB2
GB8
GB10

Hopefully see you all tomorrow.

Friday, 16 December 2011

Whats in the Box !!!!


Today I am going to share with you something that I had such fun making and if I have more time next year I am going to make some more. For the backing paper I used The Snowman CD from Crafters Companion for the inside and outside of the box. For the greeting, Christmas Trees and fence I used my wonderful ecraft machine and Core'dinations card again from Crafters Companion. The snowman was made with a template from Cathie Shuttleworth.


.

Wednesday, 14 December 2011

Polka Doodles Challenge - An Easy Christmas Card

Well today I am going to enter a challenge for one of my favourite crafting companies, Polka Doodles. Nicki's designs are always so bright and colourful and she is such a talented lady. I was lucky enough to meet her at the Harrogate show and her colouring skills are amazing. So today my card has been made using the Humphreys Christmas CD and stamps from Crafters Companion.


Paperlane Unconventional Christmas

Well today I am entering the Paperlane Challenge, this is my favourite craft shop in the North East of England. Caz is such a lovely lady and always make you feel so welcome and the shop in Northallerton is an aladdins cave. The challenge is an Unconventional Christmas and I am entering the following card, this has been made using the Humphrey's Corner Christmas CD and stamps from Crafters Companion.

Unconventional Christmas Challenge

Well today I am entering the Paperlane Challenge, this is my favourite craft shop in the North East of England. Caz is such a lovely lady and always make you feel so welcome and the shop in Northallerton is an aladdins cave. The challenge is an Unconventional Christmas and I am entering the following card, this has been made using the Humphrey's Corner Christmas CD and stamps from Crafters Companion.


Wednesday, 7 December 2011

Tutorial for Christmas Tree using the ECraft from Crafters Companion

Well today I thought that I would share with you another project using the Ecraft from Crafters Companion, I just love this machine and the more that I use it the more in love with it I become. The beauty is that you do not need any sticky mats and for me this is a god send. This Christmas Tree is so easy to make, so here goes :


You will need:

Red and Green 12 x 12 Coredinations card from Crafters Companion
Wet glue
Boxer Board and small scoring tool from Crafters Companion
Cosmic Shimmer Glitter Jewels
ECraft Machine
Fundamentals Cartridge 1

1. Using a triangle shape from the Fundamentals 1 cartridge image 18 rounded triangle cut a triangle shape 7.90" wide by 6.76 " high and score a line about quarter of an inch down one side using your boxer board and small scoring tool. Fold and burnish.

2. Using strong thin double sided tape place a piece on the scored edge.

3. Now stick your two edges together to form a cone shape.

4. Now to cut your shapes for the tree itself. For this I used Fundamentals 1 cartridge and from the Flowers section I used image 4 together with the circle from the basic shapes on the left hand side tool bar.  I cut the following sizes.

1st layer red, wide 7.50 " and high 7.50" with a circle in the centre wide 2.00 " and high 2.00
2nd layer green, wide 6" and high 6" with a circle in the centre wide 1.76" and high 1.76"
3rd layer red , wide 5.00" and high 5.00" with a circle in the centre 1.50"
4th layer green, wide 4.25" and high 4.25" with a circle in the centre 1.20"
5th layer red, wide 3.00" and high 3" with a circle in the centre 0.90"
6th layer green, wide 2.50 and high 2.50" with a circle in the centre 0.75"

These need to be scored using your boxer board and small scoring tool as shown and folded into mountain and valley folds. Place wet glue around the edges and add your Cosmic Shimmer Glitter Jewels.


5. When these layers are all dry, place some glue onto the underneath of each layer and place over your cone shape.

Monday, 5 December 2011

Tutorial for Hexagon Box using the ECraft from Crafters Companion

Well today I thought that I would share with you a project using the Ecraft from Crafters Companion, I just love this machine and the more that I use it the more in love with it I become. The beauty is that you do not need any sticky mats and for me this is a god send. This Trinket box ( I got the idea from Ustampforfun and altered it so that I could use my ecraft ) makes a lovely way to give a small gift for Christmas, so here goes :


You will need:
Fundamentals 2 cartridge
3/5 sheets of 12 x 12 Coredinations cardstock
Patterned Paper
Strong glue
Crafters Companion Boxer Board and small scoring tool.
4 round beads
Small pegs or paper clips
1 sheet photo copy paper
Cotton wool or padding


1. Using your ecraft cut out two 3" circles on your photo copy paper. Fold one in half and then half again.


2. You then need to cut out twelve 3" circles using your Ecraft machine from your coredinations card. Then taking your 3" circle cut from your photocopy paper, using your boxer board and small scoring tool score four sides where I have maked with a pencil line.


3. Now taking 6 of your 3" circles you need to transfer these score lines onto each one. I found that the easiest way to do this was to place the photocopy paper circle on top of one of your 3" coredinations circles and score them both together, this will then transfer the score line to the underneath circle, again using your boxer board and small scoring tool.


4. After scoring your 6 coredinations circles, attach them to each other at the side. Please ensure that you use a strong wet glue, I found it was best to attach one at a time and wait till it is dry before you attach the next one. I used a small peg or paper clip to hold them together whilst they are drying.


5. Once you have joined all 6 circles together, you then need to join the two ends together to form the box base, again using a strong wet glue and leave to dry. Then using your Ecraft machine and some of your coredinations cardstock cut out two hexagons, for this I used the shapes on my toolbar on the lefthand side of the screen. These need to be 4.11" wide by 4.00 high. Putting some strong glue on the tabs inside place your first hexagon inside the box. This is now how the inside and outside of your base will look.


6 . Now taking your other hexagon shape place wet glue around the edge and stick to the outside of the box base.


7. Now to make the lid. Take your second 3" circle of photocopy paper and fold in half, then fold the two outer edges into the centre.


8. On your piece of paper using your boxer board and small scoring tool score the lines where I have marked with a pencil.


9. Taking your remaining six 3" circles of coredination cardstock, score these in the same way as you did for the base.


10. Using a strong wet glue stick these sections together, let each one dry before sticking the next one, use a small peg or paperclip to hold in place. Once they are all stuck together stick the two ends together. Cut a piece of card to measure 3.25" by 2.25", score this at 1.50 and then at 1.75", this will be your hinge. Score this as shown and attach as shown.


11. Once this has dried, place your lid onto some coredinations cardstock and draw around the lid and cut out. Trim your seams and place some cotton wool or padding into the lid, this helps to give it some shape. Place glue onto the inside of your tabs, place your hexagon under the tabs and press down, this now encases your lid.

12. Attach the lid to the box base as shown


13. To decorate the inside of the lid I used the Fundamentals 2 cartridge. For the first layer using the Flower Shapes image 13 I cut this 3.50" wide and 3.50" high using green card. For the second layer I used red card and cut out image 14 again on the Flower Shapes, 2.74" wide and 2.56" high.


14. Now to decorate the outside of the box. For the base I cut 6 layers in green card 2" x 1.75" and then another six layer in red backing paper 1.75" x 1.50". Glue these together and stick them to the outside panels of the base.


15. To decorate the lid and again using green card I cut 6 triangles 1.91" wide by 2.32" high and 6 triangles in red backing paper 1.59" high by 1.99" high. For these I used the shapes on the left hand side tool bar. Glue these together and stick them to the outside panels of the lid.


16. To decorate the base panels again I used Fundamentals 2 cartridge, Flower shapes. I cut 6 pieces from image 13 1.76" wide by 1.27" high, from green card. I then cut 6 pieces from image 14 1.27" wide by 1.28" high from red card.


17. Now stick your 4 beads to the bottom of the box.

Tuesday, 8 November 2011

Sorry not been around

Hi, really sorry that I have not been around really don't know where the time has gone. I have been sorting out some new projects ready for my next DT work, so that I will be half way ready when I get the call. I have also been playing with my new toy, my Cricut Expression 2, I already have the Cricut Create but found that I need a larger area when making my projects, so as much as I love it I will have to sell it to get some of my money towards my Expression 2, but not such a hardship really. I am counting the days now to Crafters Companion Craftaganza, believe me I am so excited I think I will burst before I get chance to go :)

Today I thought that I would share with you a card I made using the Reddy Black and White  kit from Crafters Companion, this is such a beautiful kit and covers so many occassions.

Wednesday, 26 October 2011

Tutorial for Double Pop Out Card

Today I am doing a tutorial for Heather who asked if I would do one for the Double Pop Out card that I made as part of the design team for Crafters Companion using the Popcorn Pals CD-Rom. This card is really easy, but the decorating takes the time. You will need:


Ultimate Pro
7 sheets of A4 card
Backing Paper and Toppers
Popcorn Pals CD-Rom
Glue
Paper Trimmer
Martha Stewart Double Border Punch - Infinite Loops

You can make this card any size but for the above I left the length of the card but cut the width to 6", then
using my Ultimate Pro with the longest sides top and bottom I scored at the A4 gatefold line, then turning my card 180 degrees scored the same line again. You need to do this on all 6 pieces of card.


Now taking two pieces of the scored card stick flaps A & B together.


 You need to repeat this until you have 5 pieces of card stuck together in a row.


Now your two remaining pieces need to be stuck to the 3rd and 4th panels from the left. This is quite hard to show so I have done these to panels in a different colour. The easiest way I can explain it is if you start at the first small flap and say that is number one and the other side of that flap is number two, you need to stick your first piece of card onto flap 5 and the second one on flap 8. I really hope that this makes sense but please contact me if it does not make sense to you.


You now need to decorate each panel, then starting with the two middle pieces of card fold them both into the centre and then fold the outer panels towards the centre until it all folds together and looks like a piece of 6 x 6 card. I then add a piece of ribbon to use as a fastening and put my final topper on the front panel. I have tried to include as many photos as possible


Any problems please let me know.