BLOGGER TEMPLATES AND TWITTER BACKGROUNDS

Pages

Showing posts with label Ecraft. Show all posts

Wednesday, 12 December 2012

Finished Project as promised

Well I am sorry for the delay in posting the finished photoof the project that I posted a couple of weeks ago but I have just been in hospital for a small operation and must admit that I am now starting to feel better. This project started as just an idea in my head and I thought that I would share with you the finished results. I really had fun making this with the help of my ecraft machine from Crafters Companion.


Sunday, 3 June 2012

Ecraft Project Flower Card

Well here is another card I made using Eileen (my Ecraft machine), hope you like it.


You will need:

A3 card stock 1 sheet White
SVG file from SVGattic.com Me Mine - Love Card
A4 card - Centura Pearl Pastels from Crafters Companion
Satin Finish Paper from Crafters Companion
A4 Printable White card 1 sheet from Crafters Companion
12 x 12 yellow Core'dinations card bright (yellow)
Swalk Two CD from Crafters Companion
Brown Candi dots from Craftwork Cards x 4
Fundamentals 2
Glue
Quickie Glue Pen
Glitter
Foam Pads
Tim Holtz Distress Ink Mustard Seed

PLEASE NOTE TO SEE THE SCREEN IMAGES BETTER JUST CLICK ONTO IT TO ENLARGE.
Once you have opened your ecraftshop Pro software as we are going to can the size of our mat you will need to open a New Project and alter the size of the mat to 12 " by 24 ".

Bring onto your mat the SVG file Be Mine - Love Card. Leaving your aspect ratio button off turn your card around and alter the size to 7.18" wide by 14" high. Cut out and glitter the edges.


Taking a new mat cut out a square for your first mat using the shapes on the toolbar on the left hand side and layer High 6.12" x 6.30" wide. For this I used pale lemon from the Centura Pearl pastels collection from Crafters Companion.


Taking your chosen paper cut your next square High 5.87" x 6.05 wide. The paper I used is printed from the SWALK 2 CD from Crafters Companion, Co-ordinates 1 design 10 colour 5. I distressed the edges with Tim Holtz Distress Ink Mustard Seed. Mat this onto your pale lemon square. Now glue these onto your card base.

Using the same White card as used for the base, I cut out 4 scalloped squares again from the Be Mine SVG Love Card Panel One. For some reason this appears to be wider than required but if you use the sizes stated here everything will mat and layer, however if you use your own scalloped square you will need to half the dimensions for all your squares by half width wise. Alter the Panel One SVG file to 5.00" wide to 2.50" high and cut out 4 of these. Again using your Quickie glue pen glitter the edges.

Now from the pale lemon Centura Pearl card cut out 4 scalloped squares 4.50" wide by 2.25" high. Using foam pads stick these onto your white scalloped squares.

Using your printed paper cut out another 4 scalloped squares this time 4.25" wide by 2.00" high. Again distress edges with Tim Holtz distressing ink Mustard Seed. Now mat this onto pale lemon Centura Pearl scalloped squares.

Taking your yellow Core'dinations card cut out four flowers using your Fundamentals 2 SD card  from the flower tops section image 5 Poinsettia background 1.97" wide by 2.00" high. Print onto your white printable card, again I used the same backing paper as before and cut out another four flowers. Gently distress the edge of the petals of the flowers cut from Core'dinations and using your quickie glue pen glitter the petals of the flowers cut from your light printable card, shape the petals and layer these together and put a brown Candi dot in the centre.

Taking your layered flowers glue them onto the four small layered squares and attach to your base card.

To make your centre greeting out of your plain white card cut a scalloped square 4.50" wide by 2.25" high.

Your next scalloped square is cut from the pale lemon Centura Pearl card 4.25" wide by 2.25" high.
Your last scalloped square needs to have the greeting added, I cut this from my printed backing paper. Change the size of your scalloped square to 4.00" wide by 1.75" high. Click onto your mat and on the left hand side tool bar click onto the text button, I used the Monotype Corsiva font type the word Happy and change the size to 1.10" wide by 0.63" high, now click onto the draw button on the top toolbar and your text will change to purple, move this into your scalloped square. Now do the same and type the word Birthday, alter the size to 1.20" wide by 0.83" high, again click onto the draw button to turn the word purple and move this into the scalloped square. Click onto the cut button on your top toolbar and send to your Ecraft machine.

Gliiter the edges of your white scalloped square and distress the edges of your scalloped square cut from the backing paper and mat and layer these the same as before.


Attach these four scalloped decorated squares to your mat and layered card base.

Place foam pads onto the back of your layered greeting and place in the middle on the card.


Thank you for popping over to my blog, hope you enjoy making this as much as I did
Pam x


Sunday, 27 May 2012

Ecraft Project card for MUM

Hi this is a really easy card to make and I made it for my MIL birthday but you could just change the letters and make it for anyone.


Ecraft machine
1 sheet of 12 x 12 Core'dinations card Pastels
1 sheet of 12 x 12 Tim Holtz and Ranger Distress Collection
Flower Fairies CD-Rom (Rose) Crafters Companion
2 sheets Satin Finish Paper from Crafters Companion
Scalloped Edge Heart image from Ecraft
Glue
Foam Pads 
Fundamentals 1
Glitter
Crafters Companion Ultimate Pro and Boxer board
Gems

PLEASE NOTE TO SEE THE SCREEN IMAGES BETTER JUST CLICK ONTO IT TO ENLARGE.
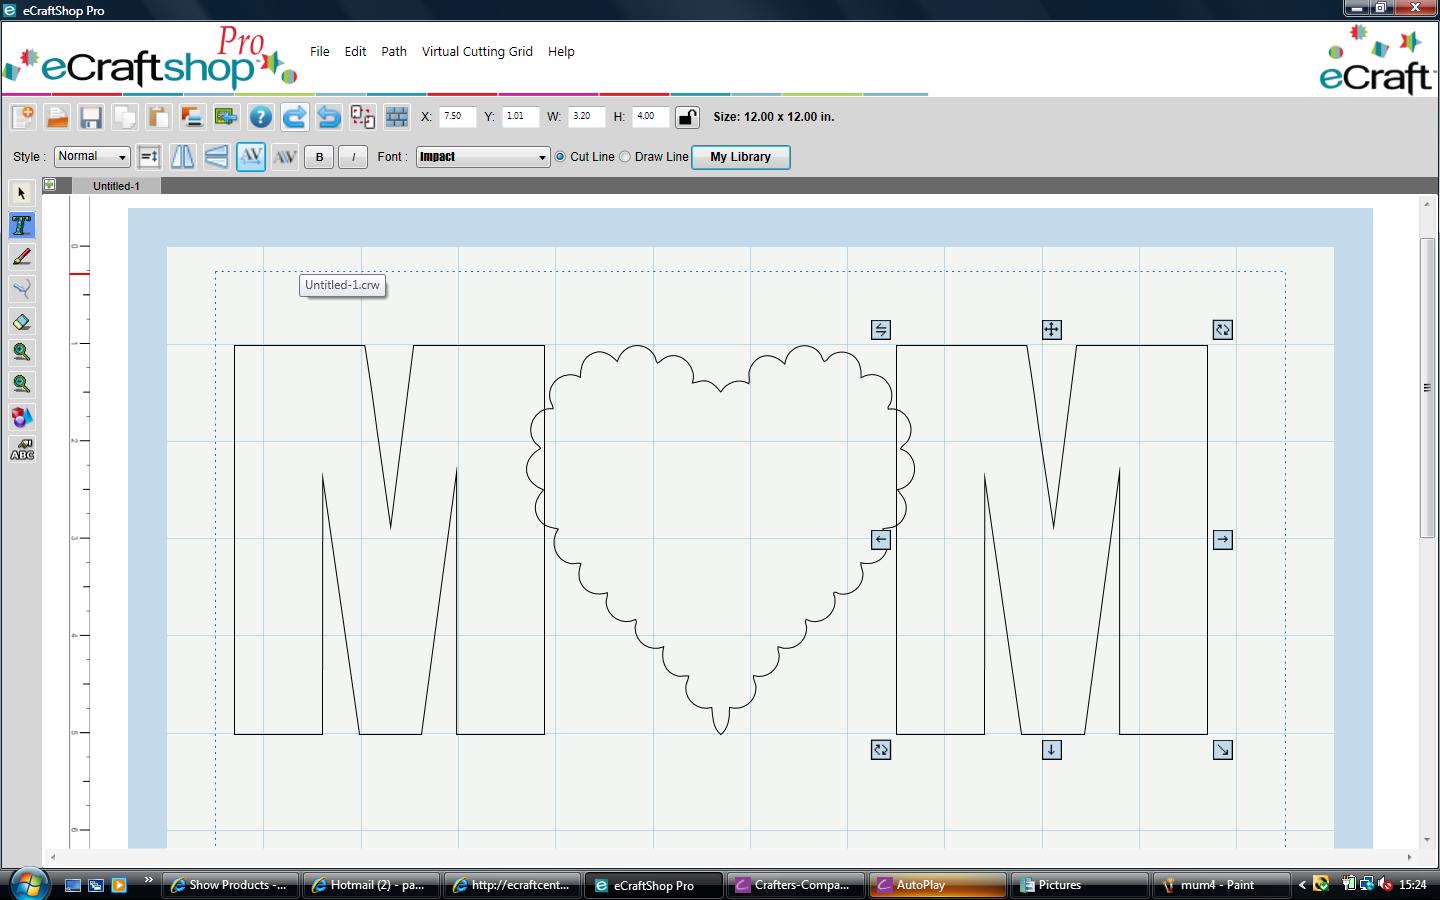
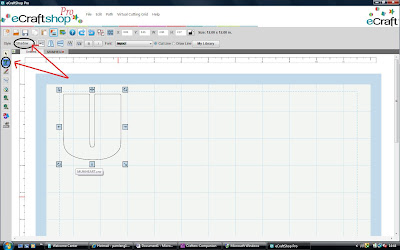
To design the card base open you mat in Ecraftshop pro software. Select the font your require I used Impact for this as it is a nice plain shape with the caps lock on, click onto the text button on the left hand side toolbar.


With the Caps lock on type the letter M. Resize this to 3.20" wide and 4.00" high. Copy and paste and move the second M to the other side of the mat.


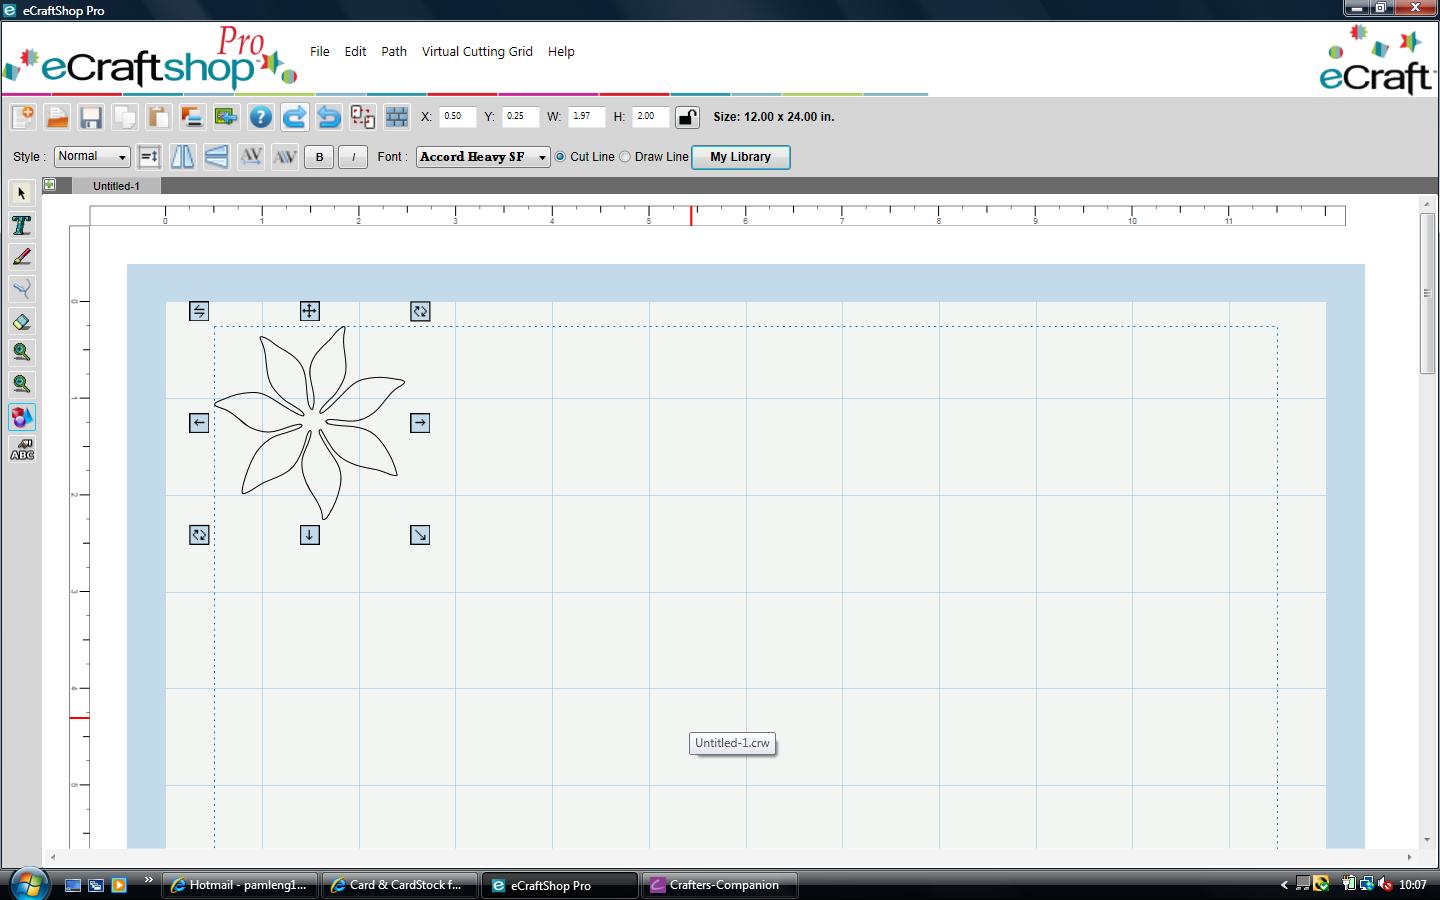
Bring in your Scalloped Edge Heart Image, I personally deleted the drawn centre image as I am going to add a topper onto the heart. Resize your heart to 4.00" wide and 4.00" high. I found it easier to line these up if each one is level with the top of the second square on the mat.

Click onto the heart and using the Kern+ feature on the top toolbar slowly move this towards to the letter M on the left hand side of the mat, until they just overlap.


Click onto the second letter M and move again using the Kern+ feature and move towards the hearts again so they slightly overlap.


On your top toolbar click edit, select all.


Again on the top toolbar click Path, Union.


Now click on Paste and Copy


Click onto the top shape and flip using the Flip Vertical button on the top toolbar.


Click onto the bottom image and using your Kern + button move it up so that it just overlaps the top image.


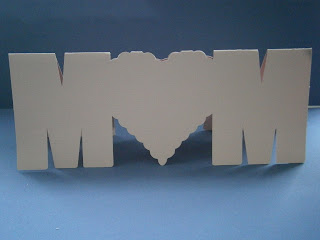
On your top toolbar click on edit, select all. Then click onto Path Union this will now join your images together. On the top toolbar change your style feature to shadow. Put your desired card into your Ecraft and cut out.


Fold your image in half and burnish with a bone folder.
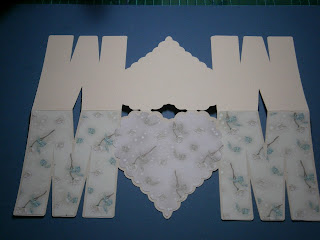
Bring a new mat into your Ecraftshop Pro and using the text feature on the left hand side tool bar and your font on IMPACT type two letter M's (don't forget these need to by with the Caps lock on) onto your mat, together with a Scalloped Edge Heart Shape. Resize your letters to 3.20" wide and 4" high and your heart 4" wide and 4" high. Make sure that your style is NORMAL on the top toolbar. Now cut these from your desired coordinating card or paper. For this I use a backing paper from the Flower Fairies Rose CD-Rom, Design 6 and colour 1 for the letter M and colour 6 for the heart. If you want to cut the flowers and heart in a different paper you will need to put them onto separate mats.

Using a new mat and your base cardstock make sure that your font in on Impact,  click onto the text feature on the left hand tool bar and with your caps on type the letter U, then resize this to 2.06" wide by 2.37" high. Then change your style to shadow and cut out.
For the next layer I used my backing paper from the Flower Fairies Rose Design 6 colour 1. Keeping the letter U on your mat alter the style to normal and then cut out.

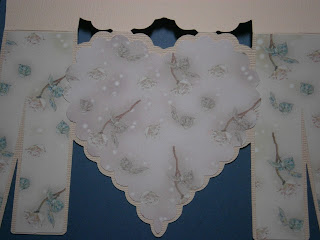
Place glue onto the back of both your letter M's and stick onto the card stock. Then place on your heart.


To make the flower embellishments ( I got this idea from Denise of Purple Paper Paradise ) using your fundamentals one flower section image 4, cut out of contrasting card 4 flower shapes 2" wide and high and then out of your backing paper 4 flower shapes 1.5" wide and high.
Now using the same flower reduce the size to 1.5" and cut out 4 of these using your backing of choice. Then glittered the outside edge of all the flowers.
Staring with your larger flower using your Ultimate Pro and boxer board score all the lines indicated on all 4 flowers. Then do the same with your small flowers.
Cut along one of the score lines in each flower to the centre and fold your score lines first starting with a mountain fold. Burnish. Now do the same with your smaller flowers.

Take two of the larger folded flowers and on one flower put some glue onto the first two folds.
Now place the first two folds of the other flower on top. Repeat this on the other side to make one complete flower. Make up the remaining flowers the same so that you have two larger flowers and two small.
Leave these to dry. I then cut a 1" circle of card and glued this to the back of the larger flower, this just enables you to arrange the mountain and valley folds and they will stay in place. Once this has dried glue your smaller flower on top. Glue a gem into the middle of the flower and attach to your card. Now matt and layer the letter U and place in the middle of the heart.


Thank you for popping over to my blog, hope you enjoy making this as much as I did
Pam x